
TABLE OF CONTENTS
DRINDINDING WHEEL INSPECTION
Before diving into the installation process, you’ll need to become a grinding wheel detective! Proper inspection ensures you’re working with a safe and efficient tool. Here’s what to look for:
VISUAL INSPECTION
Grab your magnifying glass (or just good lighting) and give the wheel a thorough examination. Look for any cracks, chips, or uneven wear on the grinding surface. These imperfections can cause the wheel to break apart during operation, posing a serious safety risk.
Is the wheel dirty or caked with debris? This can affect grinding performance and lead to uneven results. Inspect the wheel’s bond (the material holding the abrasive grit together). A weak or crumbling bond indicates the wheel is nearing the end of its lifespan and should be replaced.
LABEL VERIFICATION
Grinding wheels come in various specifications suited for different materials and tasks. Don’t be fooled by appearances! Double-check the label information to ensure the wheel’s grit size, grade, and bond type are appropriate for your intended use. Using the wrong wheel can lead to poor grinding results, increased wear on the wheel, and even damage your workpiece.
The label should also specify the maximum safe operating speed (RPM) for the wheel. This needs to match the capabilities of your grinder. Using a wheel exceeding the grinder’s RPM rating is extremely dangerous and can cause the wheel to shatter.
By following these inspection steps, you can ensure you’re installing a safe and effective grinding wheel for the job at hand. Remember, a little detective work upfront can prevent a big headache (or worse) down the line during grinding wheel installation
CHECKING THE GRINDER
Just like the grinding wheel itself, your grinder needs to be in top shape for a successful installation. Here’s what to consider before mounting your new wheel:
COMPATIBILITY
First things first, ensure your grinder is designed for the size and type of grinding wheel you’ve chosen before installation. The wheel’s arbor hole diameter needs to match the spindle size of your grinder. Forcing a mismatched wheel onto the spindle can damage both the wheel and the grinder. Consult your grinder’s manual or refer to the size markings on the grinder itself for confirmation.
CONDITION
Give the spindle a spin by hand. It should rotate smoothly and free of any wobble or excessive play. If you detect any irregularities, it’s best to have a qualified technician service your grinder before proceeding.
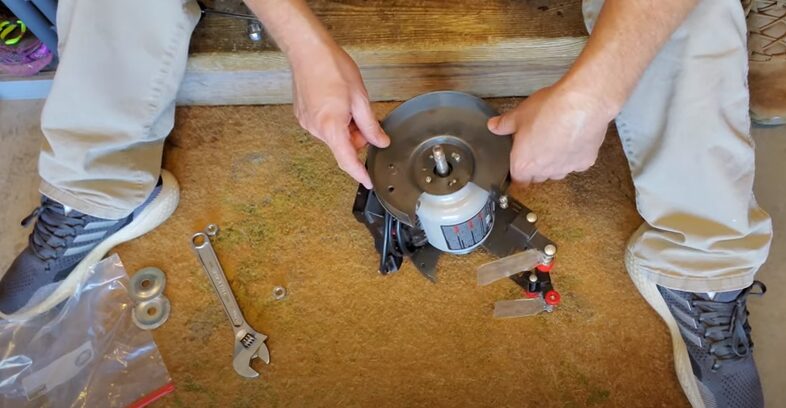
The mounting flanges hold the grinding wheel securely in place. Inspect the flanges for any cracks, warping, or uneven wear. These imperfections can affect the balance and stability of the wheel during operation. Replace any damaged flanges before installing the new grinding wheel.
PREPARING THE WORK AREA FOR GRINDING WHEEL INSTALLATION
Now that you’ve inspected your grinding wheel and confirmed your grinder’s readiness, it’s time to prepare your workspace for a smooth installation process. Here’s what to keep in mind:
CLEANLINESS
Before you begin, take a moment to clean the grinder and the surrounding area. Sweep away any dust, dirt, or metal shavings that might have accumulated. A clean workspace not only promotes safety but also helps you identify any potential damage to the grinder or wheel during inspection.
Pay particular attention to the mounting surface of the flanges and the grinder’s arbour. These areas need to be free of oil, grease, or coolant residue to ensure proper adhesion and secure mounting of the grinding wheel. Use a clean rag with a suitable solvent (consult your grinder’s manual for recommendations) to remove any contaminants.
SAFETY PRECAUTIONS
Grinding operations can generate dust particles. Ensure proper ventilation is in place to remove these airborne particles and protect yourself from inhalation. An exhaust fan or working outdoors in a well-ventilated area are good options.
Don’t underestimate the importance of wearing proper Personal Protective Equipment (PPE) during grinding wheel installation and operation. This includes safety glasses with side shields to protect your eyes from flying debris, a respirator to prevent dust inhalation, and hearing protection to guard against noise exposure.
MOUNTING AND BALANCING
With a clean workspace and safety measures in place, you’re ready for the final act: mounting and balancing the grinding wheel!
MOUNTING PROCEDURE
Every grinding wheel and grinder may have slight variations in the mounting process. For specific instructions, it’s crucial to refer to the manufacturer’s manual for both the grinding wheel and your grinder’s installation. These manuals will typically detail the following steps:
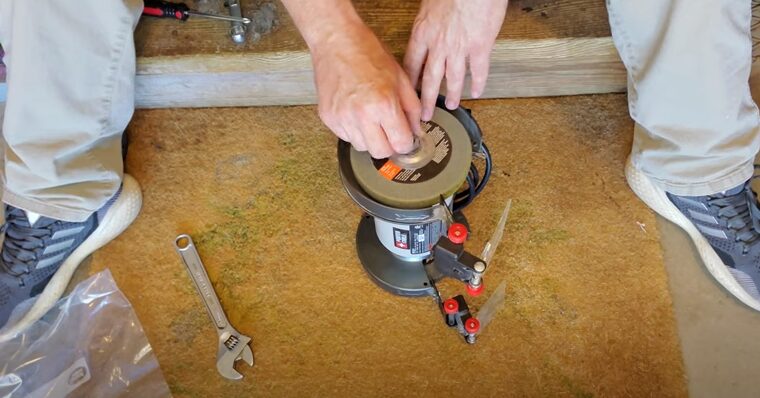
- Flange Placement: The grinding wheel is sandwiched between two mounting flanges, one on either side. The manual will specify the correct orientation and placement of the flanges.
- Spindle Fit: Carefully slide the grinding wheel onto the arbor of the grinder, ensuring a snug and centered fit.
- Tightening Sequence: The mounting flanges are secured with nuts or bolts. The manual will outline the proper tightening sequence and torque specifications to ensure the wheel is securely fastened without putting undue stress on the flanges or the wheel itself.
BALANCING
Even a minor imbalance in a grinding wheel can cause significant vibrations during operation. This can not only lead to uneven grinding results but also put stress on the grinder and increase the risk of wheel breakage. To prevent this, most grinding wheels, especially larger or high-speed wheels, require balancing before installation.
A wheel balancer is a specialized tool used to detect and correct any imbalances in the grinding wheel. The wheel is mounted on the balancer, and the tool spins it to identify any off-center weight distribution. Balancing weights are then added to the appropriate location on the wheel to achieve a perfectly balanced state.
SECURING THE WHEEL
How you use your grinding wheel can significantly impact its lifespan. Here are some key operating conditions to consider:
TIGHTENING
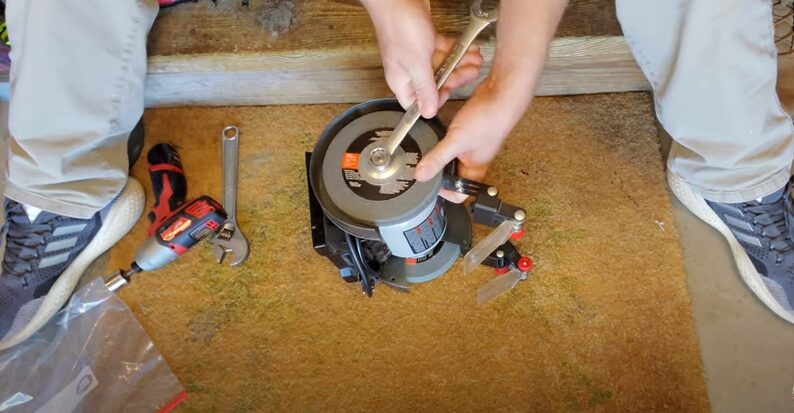
Refer back to your trusty manufacturer’s manual for specific tightening instructions. Most manuals will specify the recommended torque value for the mounting nuts or bolts. Using a torque wrench ensures you achieve the proper tightness without over-tightening, which can damage the flanges or the wheel itself.
For even and secure tightening, follow a star pattern when tightening the mounting nuts or bolts. Tighten each nut or bolt slightly in succession, then come back around and repeat the process until all fasteners reach the specified torque during installation.
CHECK STABILITY
Once tightened, gently spin the grinding wheel by hand. The wheel should rotate freely with minimal play or wobble. Excessive movement indicates the wheel is not securely fastened. Re-check the tightness of the mounting hardware following the star pattern and consult the manual if necessary.
TESTING BEFORE USE
Before diving headfirst into your grinding project, a crucial safety step remains: testing the newly installed grinding wheel.
TEST RUN
Plug in your grinder and turn it on. Allow the wheel to reach its operating speed as specified in the grinder’s manual. Stand back and observe the wheel’s behavior. Pay close attention to any abnormal sounds during the operation. A grinding wheel that is out of balance or improperly secured will likely generate noticeable vibrations and grinding noises. These are red flags indicating the wheel needs further attention before use.
ADJUSTMENTS
If you detect vibrations, the wheel might require additional balancing during installation. Consult a qualified technician if you’re not comfortable using a wheel balancer yourself. If the issue lies with the wheel’s stability, re-tighten the mounting hardware following the star pattern and torque specifications. If the problem persists, refer back to the manufacturer’s manuals for both the wheel and the grinder for troubleshooting steps.
TAKE A MOMENT TO REMEMBER SAFE PRACTICES
Before you unleash the grinding power of your newly installed wheel, review safe operation procedures.
SAFETY CHECKS
Don’t underestimate the importance of reviewing safety guidelines for operating your grinder and handling grinding wheels. These guidelines typically cover important aspects like ensuring proper work area ventilation, maintaining a safe distance from the grinding wheel while operating, and proper workpiece positioning techniques. Many grinder manufacturers include safety instructions in their manuals, and the Occupational Safety and Health Administration (OSHA) offers valuable resources online to guide you during installation.
Take a moment to rehearse the safe operating procedures for your grinder mentally. Visualizing yourself using the tool correctly can help prevent accidents and ensure a smooth workflow.
PERSONAL PROTECTIVE EQUIPMENT
Always wear appropriate Personal Protective Equipment (PPE) during grinding wheel installation and operation. This includes safety glasses with side shields to protect your eyes from flying debris, a respirator to prevent dust inhalation, and hearing protection to guard against noise exposure. Remember, safety glasses alone might not be sufficient depending on the grinding operation, so consult the manufacturer’s recommendations for the specific task at hand.
By taking the time to review safety guidelines and ensure proper PPE use, you’re prioritizing your well-being and creating a safe environment for grinding.
DOCUMENTATION AND RECORD KEEPING
Congratulations! You’ve successfully installed your grinding wheel. Now, let’s talk about keeping track of this important event for future reference.
Maintaining a grinding wheel maintenance log is a wise practice. In this log, record the date of installation, the specifications of the grinding wheel (including size, grit, and bond type), and any maintenance performed on the wheel throughout its lifespan. This information will be valuable for future wheel replacements and can help you track the performance and wear of different grinding wheels for various tasks.
Don’t throw away the manufacturer’s instructions for your grinding wheel and grinder! Keep them in a safe and easily accessible location. These manuals contain valuable information not only for installation but also for troubleshooting, maintenance procedures, and proper operating techniques. Having them readily available will save you time and ensure you’re using your grinding equipment correctly.
Conclusion
Practicing these basic safety measures before a grinding wheel is used is the best investment in personal safety, efficiency, and finishing a grinding project on time. By consistently inspecting the wheel and equipment, setting the ground for work, and mounting and balancing it, you can guarantee that the installation process is safe and quiet. Always keep in mind that the easiest way to avoid accidents and damage to your grinding wheel is by getting prepared a little bit prior. Armed with this information, you can now face your grinding assignment with a sure hand; being safe and performing as best as you can.